
Safe Route to School — How to Plan and What to Do If Your Child Deviates
From the perspective of a computer science educator with over 25 years of IT experience.
The First Time Alone to School
It's one of those moments you remember. The child leaves home, turns around once, waves — and walks. Alone. To school.
For the child, it's a step toward adulthood. For the parent — 20 minutes of nerves.
And that's completely natural. But instead of accompanying the child invisibly (or helicopter-parenting) — we can prepare.
Statistics: The School Route in Numbers
Polish National Police data (2024):
- 1,247 accidents involving pedestrians under 15
- 73% occurred in built-up areas
- Peak hours: 7:00-8:00 AM (to school) and 1:00-3:00 PM (from school)
- Most common causes: improper crossing (42%), driver speeding (31%), poor visibility (15%)
Conclusion: the route to school isn't "dangerous per se" — but requires preparation, habit, and awareness.
How to Plan a Safe Route? 7 Steps
Step 1: Walk the Route TOGETHER with Your Child
Don't just say "go this way." Walk it together at least 3 times:
- Once at a calm pace, pointing out all important spots
- Once during morning rush hour (real conditions)
- Once when the child leads and you follow behind, observing
Step 2: Identify Risk Points
Mark on the route:
- Pedestrian crossings — which have traffic lights, which don't
- Intersections — where to look both ways (and where three ways)
- Areas without sidewalks — walking on the shoulder?
- Garage and parking entries — drivers often don't see pedestrians
- Empty stretches — streets without houses, parks, underpasses
Step 3: Choose the SAFER Route, Not the Shortest
Often the shortest path goes through a busy intersection or dark passage. A longer route with sidewalks, lighting, and signalized crossings — is better.
Step 4: Establish Plan B
What if there's road work? Closed street? Unleashed dog?
The child needs an alternative route AND must know what to do in unusual situations:
- "If a crossing is closed — go to the next one, don't cross just anywhere"
- "If someone bothers you — enter the nearest shop and ask for help"
Step 5: Reflectors and Visibility
From October to March it's dark at 7:00 AM. The child MUST be visible:
- Reflective elements on backpack and jacket
- Bright clothing colors
- Flashlight on backpack if route has no lighting
Step 6: Crossing Rules — Repeat Like a Mantra
- STOP at the curb edge
- LOOK left, right, left again
- LISTEN — remove headphones (!)
- WALK when it's safe — don't run across
- LOOK at drivers — make sure they see you (eye contact)
Step 7: Phone in Pocket — Not in Hand
A child walking to school with phone in hand is a child NOT watching the road. Phone should be in backpack or pocket. Music — silence or speaker (not in-ear headphones).
Safety Corridor in MichalKids
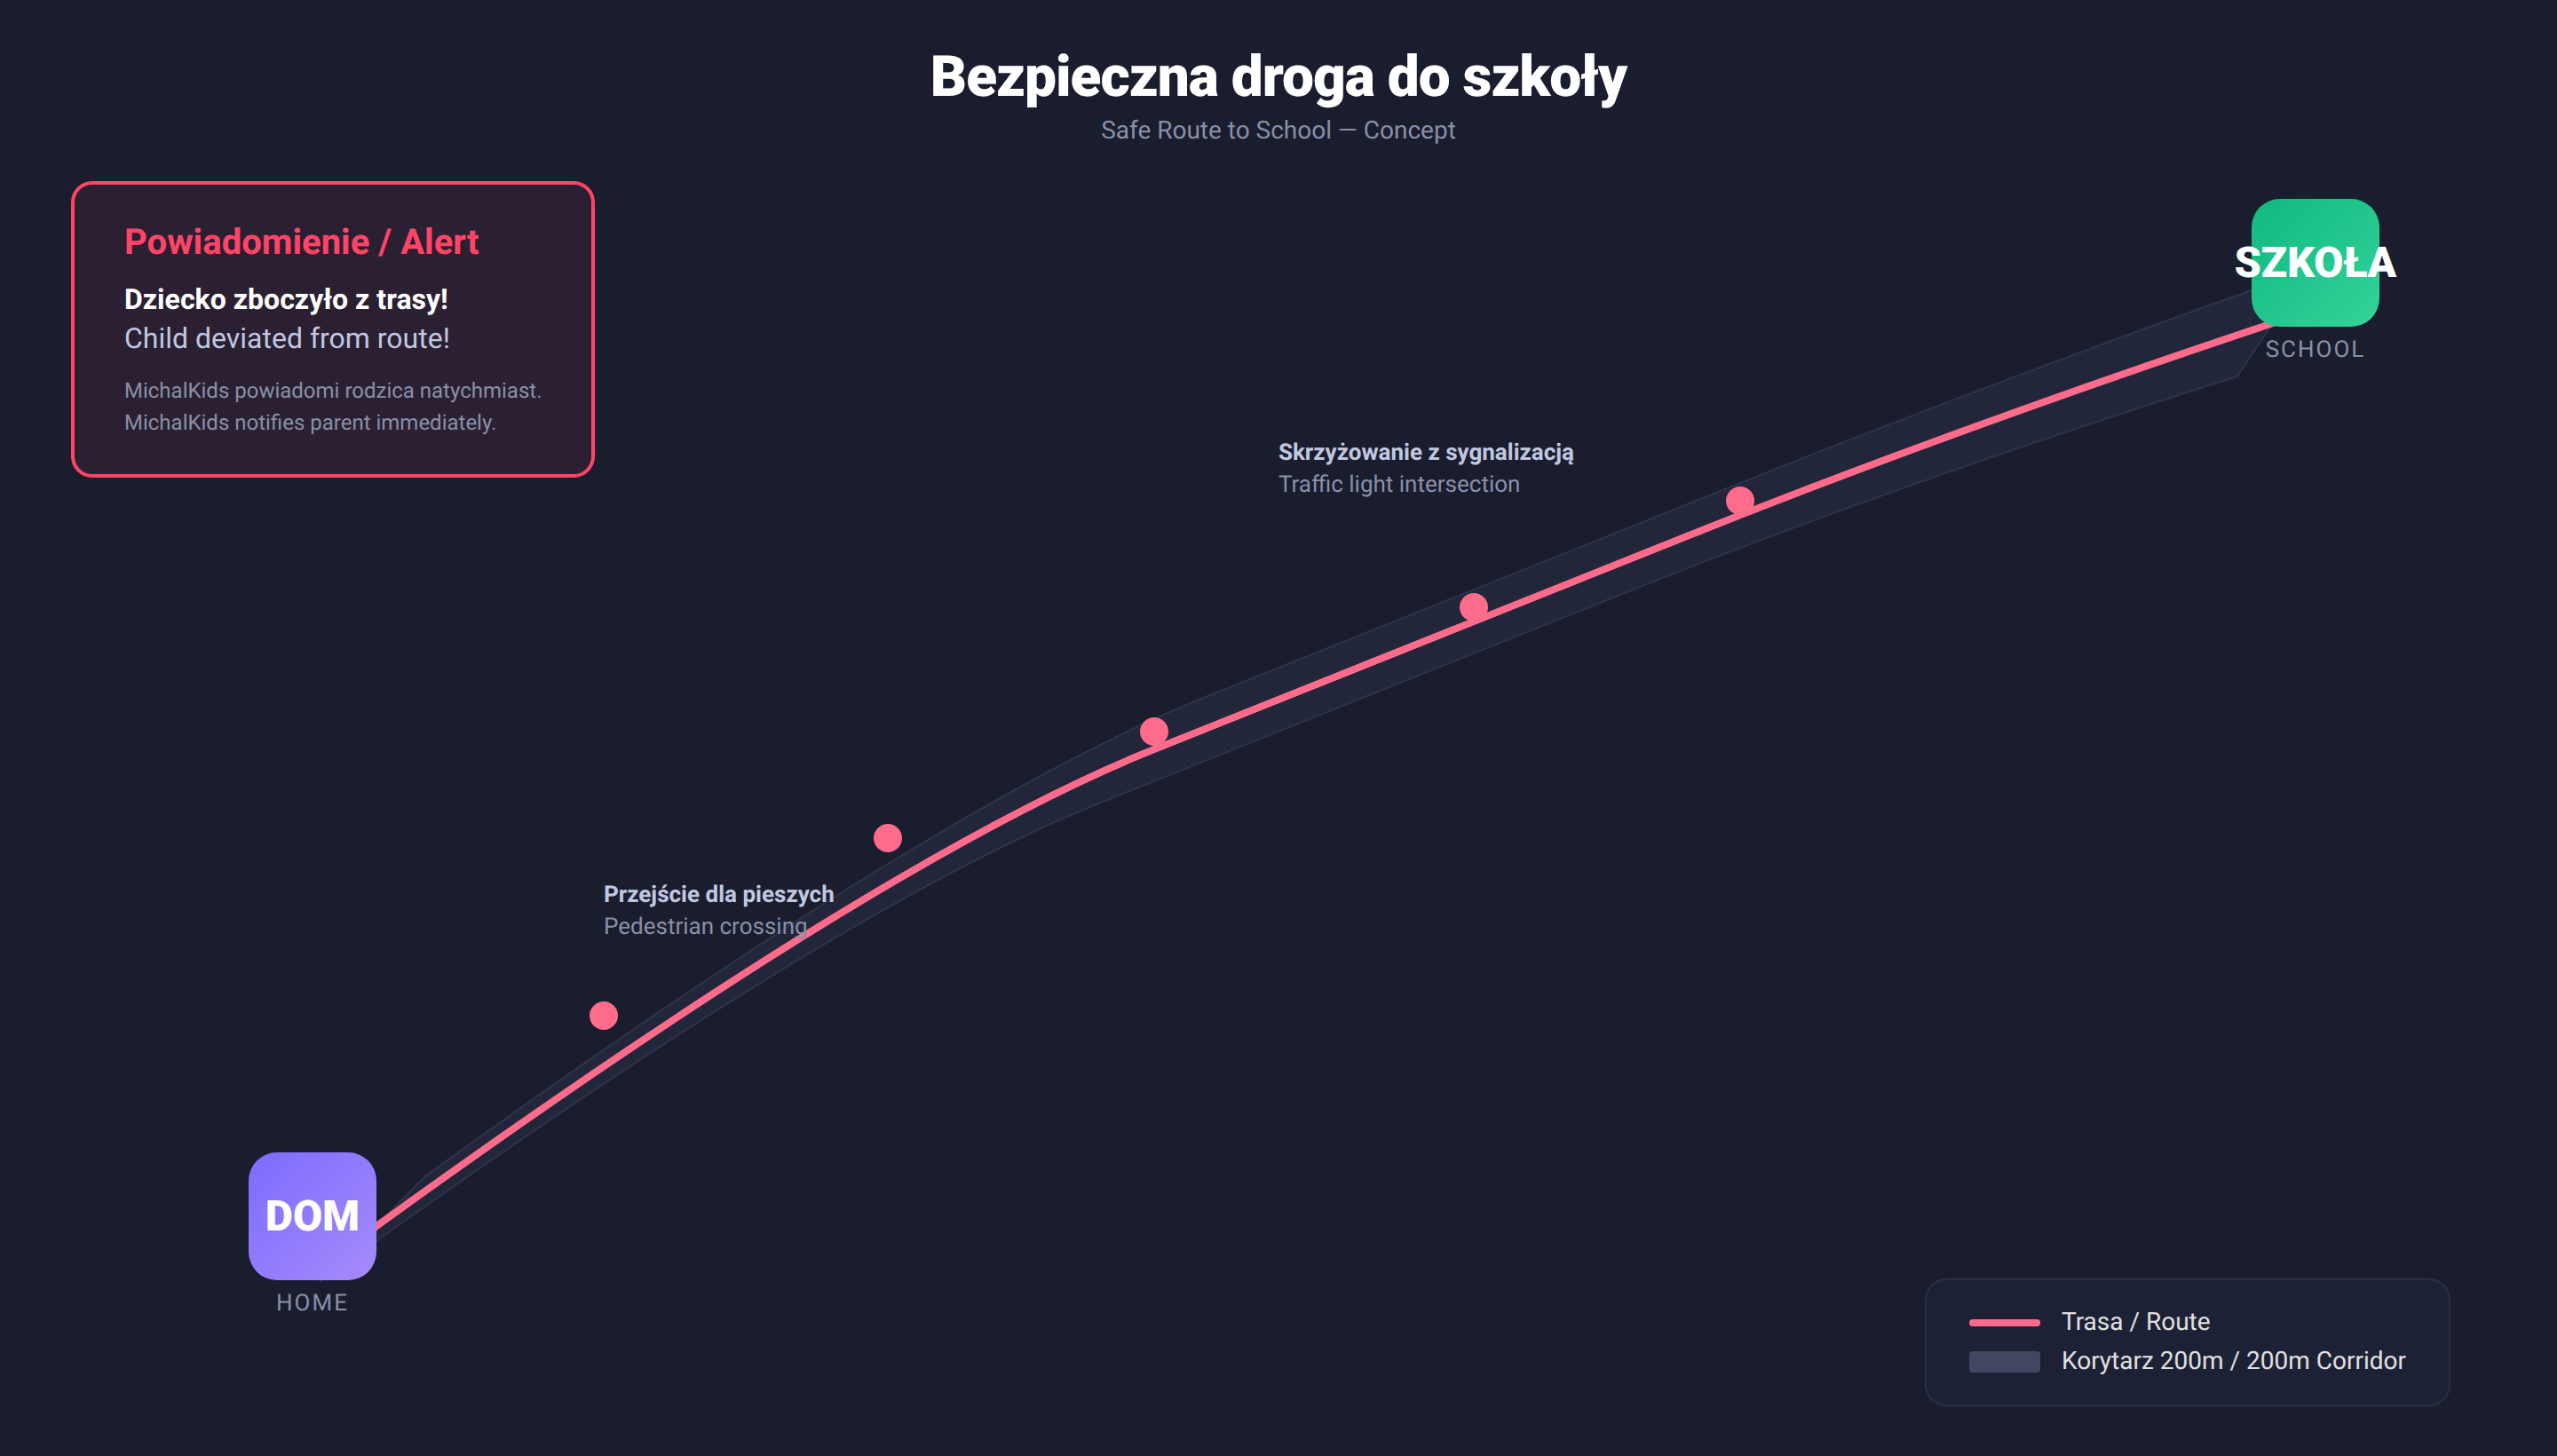
What Is It?
The safety corridor is a 200m zone around the planned route. If the child goes beyond this zone — the parent receives a notification.
How It Works:
- Parent and child plan the route in MichalKids app (or child walks it once and the app remembers)
- Route matching — route follows actual streets (not straight lines), matching real sidewalks and roads your child actually walks on
- 200m corridor — "OK" zone around the route. Child can cross the street, stop at a shop — that's normal
- Deviation alert — if child goes beyond 200m, parent gets a push notification
- ETA — estimated arrival time. If child should be at school by 7:45 but hasn't arrived by 7:50 — notification
What We DON'T Do:
- Don't auto-call the child — they might walk a different way with a friend, that's OK
- Don't lock the phone — child can call for help
- Don't alarm immediately — first alert is information, not panic
The parent decides what to do with the alert. MichalKids informs — doesn't intervene.
Auto-Start Route
MichalKids can automatically start recording the route when the child leaves home (exits the "Home" safe zone). No need to remember to turn it on.
AI suggests new safety zones based on habits — e.g., "Your child often stops at this shop on the way from school — want to add it as a safe zone?"
Exercise: Safety Map
Print a neighborhood map (Google Maps) and together with your child:
- Mark home, school, friends' houses
- Draw the main route (green) and backup (blue)
- Mark dangerous spots (red): busy intersections, no sidewalk
- Mark safe spots (yellow): shops, pharmacies, friends' homes — where the child can enter for help
Hang the map on the fridge. The child will be proud of "their map."
What We're Planning at MichalKids Academy
Coming Soon
Learning path "Street Smart — Safe Pedestrian" prepares children for independent walking:
- Module 1: Pedestrian rules (crossings, traffic lights, traffic)
- Module 2: Route planning (map, risk points, Plan B)
- Module 3: Visibility and reflectors (picture quiz)
- Module 4: Preparing for a cycling permit (from age 10)
- Street Smart Certificate — after completing the path
Guardian, not a spy. We don't walk behind the child — we teach them to walk safely on their own.
Sources:
- Polish National Police — Pedestrian Accidents (2024)
- WORD — Pedestrian Safety Rules
- WHO — Global Status Report on Road Safety (2023)